Photoshop Tutorial – Colouring by Sean Harrington
Looking for a photoshop tutorial to colour your artwork? From Sean’s original post, he was kind enough to do a step by step breakdown of the process involved.
Red Sonja Colouring Process by Sean Harrington
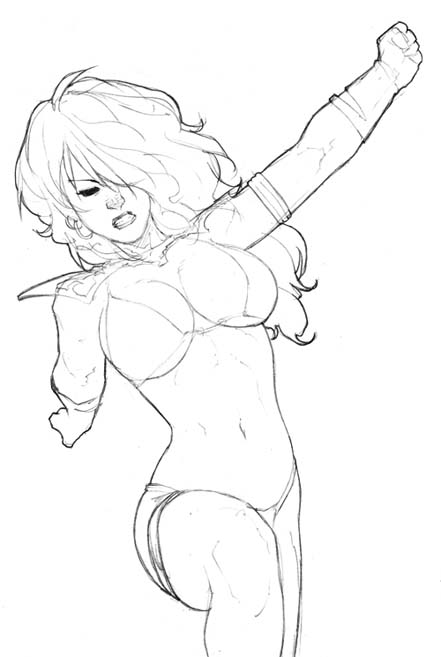
Step 1:
This is the initial pencil sketch that will be the basis of the picture. I don’t bother with really clean lines as you can see, since most of the lines won’t be visible in the final picture. I darkened it a bit in Photoshop so that it will be easier to see against the background color.
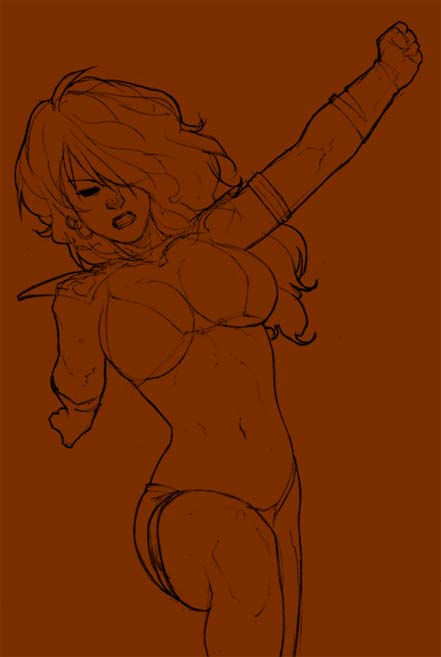
Step 2:
Speaking of the background color, here it is! I put the lineart on a multiply layer and the background color is on a layer underneath. This is the layer I’m going to color on.
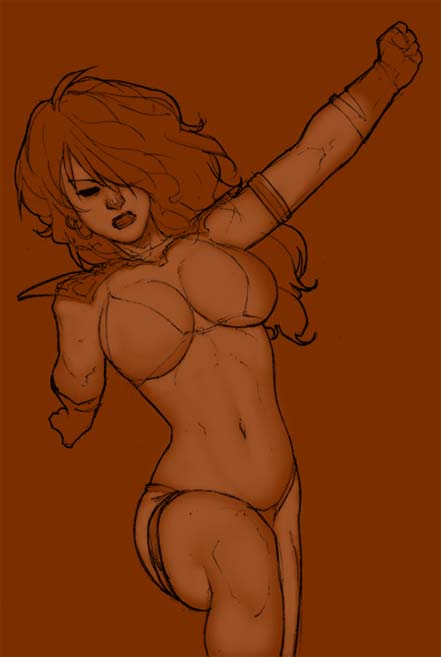
Step 3:
Now I lay down my first and darkest skin tone. I’m using a standard soft-edged brush in Photoshop. As you can see, I’m not really defining much with this color; just a few places where the darkest shadows will be, like under her chin, where I use hard-edged brush to make a stronger line.
Step 4:
Next lighter color coming up! With this color I begin to add most of the major definition to the body. I’m still using mainly a plain soft-edged brush for most of this, just switching to a hard-edged brush to define the lines of the body, such as under the breasts and around the bend in the leg. It’s important not to define things TOO well, because if you do, it will leave very sharp contrast between the dark and light colors, which doesn’t look very realistic. Take a look at some photographs of people, and you’ll see that the definition of the features and muscles, etc., is actually rather slight. Less is more, as it were.
At this stage I also start erasing and lightening some of the lines, as I don’t need them anymore. You can do this by painting white with a brush on the lineart multiply layer.

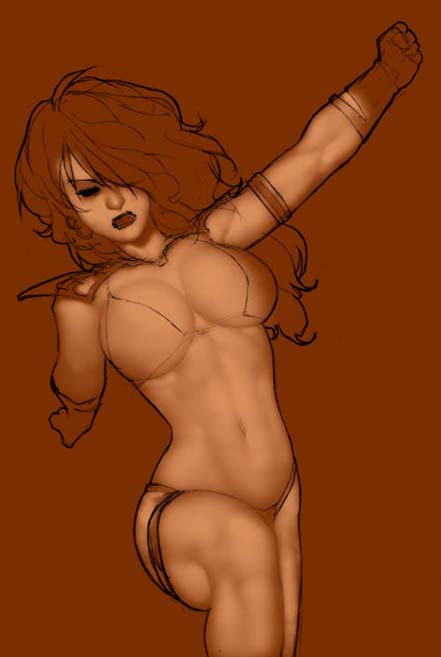
Step 5:
Now it’s time to add the main lightest skin tone. This color is used much the same as the previous color, just bringing a little more definition to the body all with the standard soft-edged brush. When you’re picking colors to use for skin tones, this is the color that is going to be most representative of the skins’s final appearance, so choose it first, and base the darker and lighter gradations off of it. Oh, and go ahead and get rid of the remaining lines at this point, too. You shouldn’t need them anymore. I leave the outer outline because I like the look, but you can get rid of it too, if you like it better without.
Step 6:
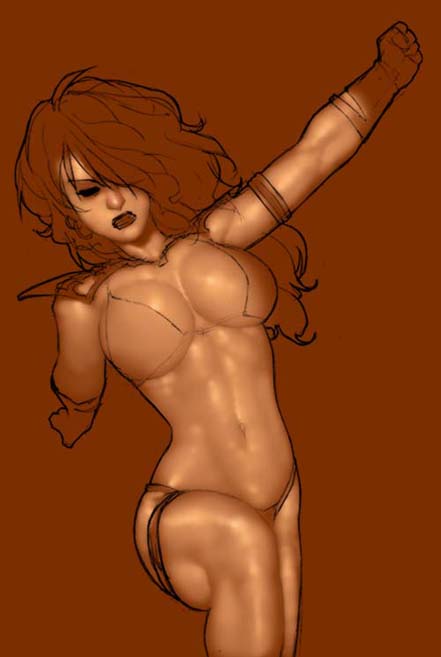
Now it’s time to add highlights to the skin. Ordinarily it’s good to keep these fairly muted, but in this case I used a heavier hand with them to give the appearance that she’s sweaty. I assume that slaying a horde of bloodthirsty barbarians would make one sweaty, but I can’t say so with absolute certainty, so if you know otherwise adjust your highlight intensity accordingly. I also added a slight reddish cast to her nose because I think it looks good, but do as you wish.
Step 7:
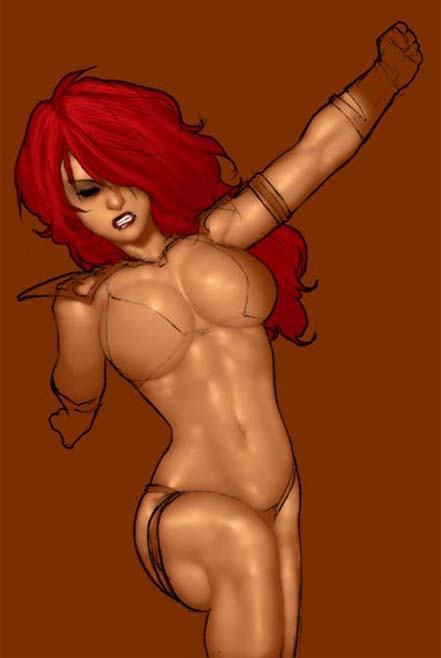
Now it’s time for hair and makeup. Yes, makeup. She’s not just a barabarian, she’s a barbarian PRINCESS, after all. You can buy brushes that simulate strands of hair which makes coloring the hair easier, or you can just do each strand individually with a really small standard brush if you’re a purist or a cheapskate.
Step 8:
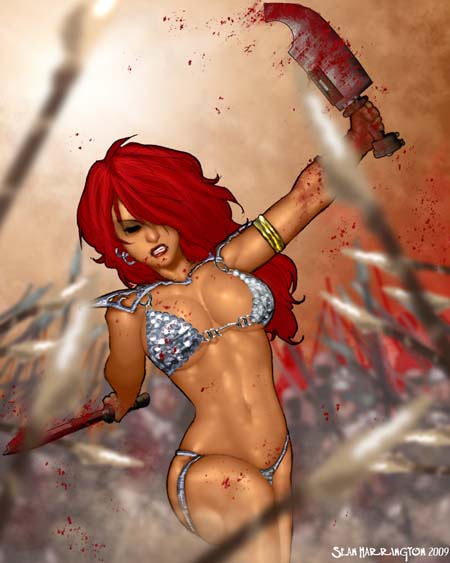
Now for the armor. The best and easiest way to get good metal effects is to lasso the different parts of the armor, paste them to a new layer and use layer styles to get a look you generally like then merge it back down to background layer and touch it up a bit with the brush. If you’re a purist that disdains styles and filters and such…well, you’re on your own.

Final Picture:
Add a spiffy background of your choice and voila!
Here are the colors that I used:
Background:
R= 123 G= 46 B=0
Step 3: RGB 157 – 83 – 39
Step 4: RGB 183 – 110 – 64
Step 5: RGB 217 – 142 – 90
Highlight colors:
RGB 250 – 173 – 103
RGB 251 – 199 – 147
Posted: April 30th, 2009 under art, comic, Featured Artist.
Tags: art, artist, color, colour, comic, fantasy, harrington, online, photoshop, red, sean, sexy, sketch, sonja, tutorial

This is awesome! Great to see stuff like this. Very awesome and helpful indeed! :)
Wow what an awesome tutorial! It’s really cool to see what techniques other artists use.
Great tutorial but Sean makes it sound unbelievably easy lolz. Very talented indeed!
I do use photoshop a little and Sean’s tutorial is fantastic. I agree with all the above posts, he’s very talented indeed.
Stephen, thanks for the opportunity to put up this tutorial. I appreciate it a lot, as well as all the kind comments I have recieved.
Excellent tutorial! Thanks for sharing.
Great stuff here. I’ve really got to get crackin’ on my cg coloring again. The problem is finding the right environment and motivation to do so. That’s it, I’m moving to the mountains.
Wow. Stumbled on your blog from a comment on mine. Fascinating stuff – very impressive!
photo :
Agreed! Impressive tutorial from Sean.
John :
You don’t need to go all the way to the mountains. Just need to find your quiet place to practice.
Forager :
Thanks for visiting. This tutorial was written by Sean (can’t take credit) and it’s a very good step by step breakdown.